The First 24–48 Hours After Water Damage: Steps to Prevent Mold
When water damage strikes, the clock starts ticking. Within 24 to 48 hours, the conditions are ideal for mold to begin spreading across damp walls, flooring, and furniture. Acting fast is essential to prevent costly repairs and protect your indoor air quality. At Dr. Mold Removal, we've seen how quickly moisture can turn into a full-blown mold issue-and we're here to guide you through the first critical steps to prevent mold after water damage.
Step 1: Prioritize Safety and Stop the Source
Before you begin cleanup, make sure the area is safe to enter. If there's standing water near electrical outlets or appliances, shut off power to the affected area. Once it's safe, identify and stop the source of water-whether it's a burst pipe, roof leak, or appliance malfunction. Stopping the source quickly prevents additional saturation and gives you a head start on recovery.
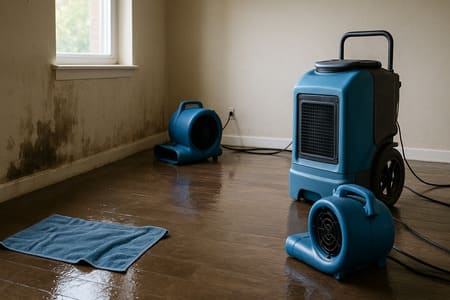
Step 2: Start Drying Immediately
The drying process is the most crucial factor in preventing mold. Mold spores thrive in damp conditions, and surfaces that remain wet for over 48 hours are prime targets. Use fans and open windows to promote airflow, but avoid humid outside air if the weather is damp. A properly sized dehumidifier can make a huge difference in reducing indoor moisture. Dehumidifier sizing depends on both the square footage of the affected area and the level of humidity-larger spaces or severe flooding require a higher-capacity unit to achieve effective drying.
Step 3: Remove Wet Materials and Porous Items
Carpets, drywall, insulation, and furniture that have absorbed water can trap moisture deep inside, making them difficult to dry fully. Whenever possible, remove soaked materials to speed up evaporation and reduce the risk of hidden mold growth. Even if something looks dry on the surface, moisture may still linger beneath. You can even call on Dr. Mold Removal for water removal services that ensure your space dries quicker.
Step 4: Monitor Drying Timelines and Conditions
Keeping track of drying timelines helps ensure the area truly returns to safe moisture levels. Depending on the extent of water exposure, the drying process can take anywhere from 24 hours to several days. Use moisture meters or infrared cameras, if available, to detect hidden dampness in walls or subfloors. Inconsistent drying can lead to delayed mold growth weeks later.
Step 5: Know When to Call Remediation Experts
Not all water damage can be handled with DIY drying. If the affected area is larger than 10 square feet, involves contaminated water, or has a musty odor after 48 hours, it's time to contact professionals. Certified specialists have industrial drying equipment, air scrubbers, and antimicrobial treatments that can eliminate mold at its source. Here are key signs that it's time to bring in the pros:
- Persistent musty smells even after drying
- Visible mold spots or discoloration on surfaces
- Water damage that reached behind the walls or under the flooring
- Ongoing humidity or condensation despite running dehumidifiers
Step 6: Protect Against Future Growth
Once the area is dry, inspect for leaks, condensation, or drainage issues that could cause repeat damage. Regularly maintaining HVAC systems and using a properly sized dehumidifier can keep humidity under control long-term. Prevention is always less expensive than remediation.
If you suspect hidden moisture or early signs of mold after water damage, don't wait. Contact Dr. Mold Removal, your trusted mold removal professionals serving NYC, for a thorough inspection and remediation plan. We're available 24/7 to restore your home or business to a clean, safe, and healthy environment.